Configuration procedure to setup Cisco Hyperlocation/ Halo
Note: This is a quick reference technote. For detailed info please checkout the product configuration and installation guides.
- WLC Code (5520 - 8.1.131.0)
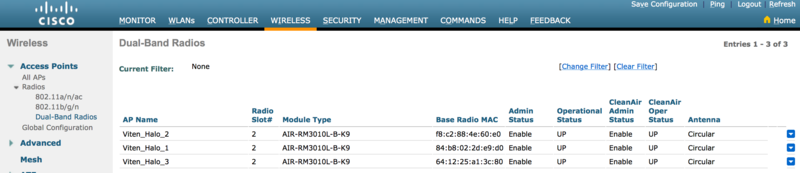
Once the AP (with the module AIR-RM3010L-B-K9 and Halo antenna array) is associated with the WLC, go to Wireless > Access Points > Radios > Dual Band radios
You can find useful information like radio slot number, module number, antenna type etc.
- Prime Infrastructure
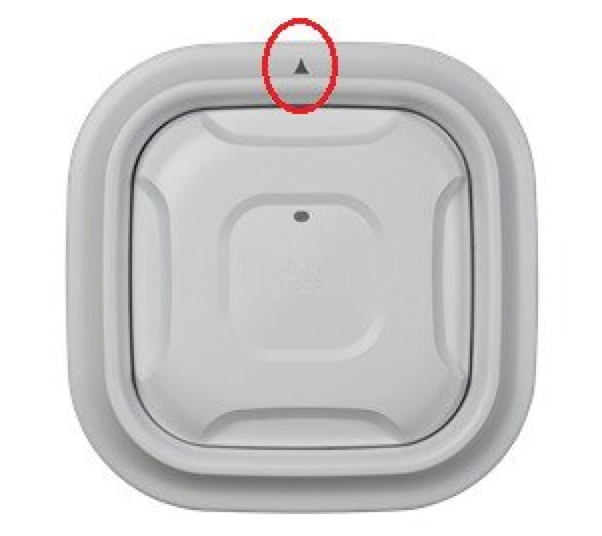
Add the WLC to Prime (PI 3.0). Make sure you have the latest Maps configured on Prime and place the APs as accurately as possible on the Maps. When you place the APs on the Map, you will need to manually set the orientation of the AP
more info on AP placement on Prime Maps
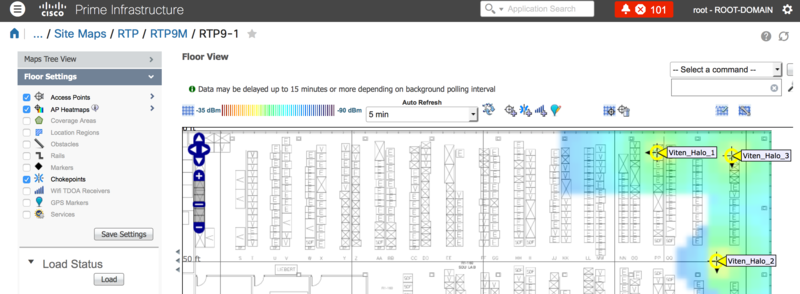
It is a recommendation that the APs be mounted with the azimuth pointing in the same direction in the area
The black arrow in the AP icon on the heatmap shows hyperlocation
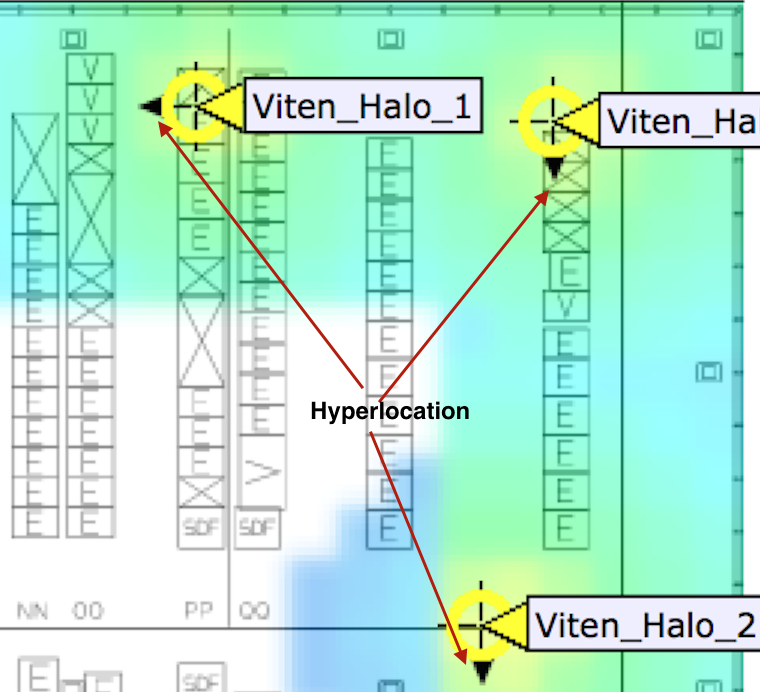
If you notice the azimuth are facing in different directions. Physically they are facing the same direction, but maybe I made a mistake when I manually configured the AP orientation on the Maps.
- MSE/ CMX (10.2.1) Installation
http://www.cisco.com/c/en/us/td/docs/wireless/mse/10-2/installation/guide/installation_guide/MSE_Installation_Using_Vsphere_Client.html
note: I did not follow step 6 to setup a new interface. I used the existing eth0 and configured a static ip address. I did not configure DNS details on the interface config page as instructed.
- MSE-WLC pairing
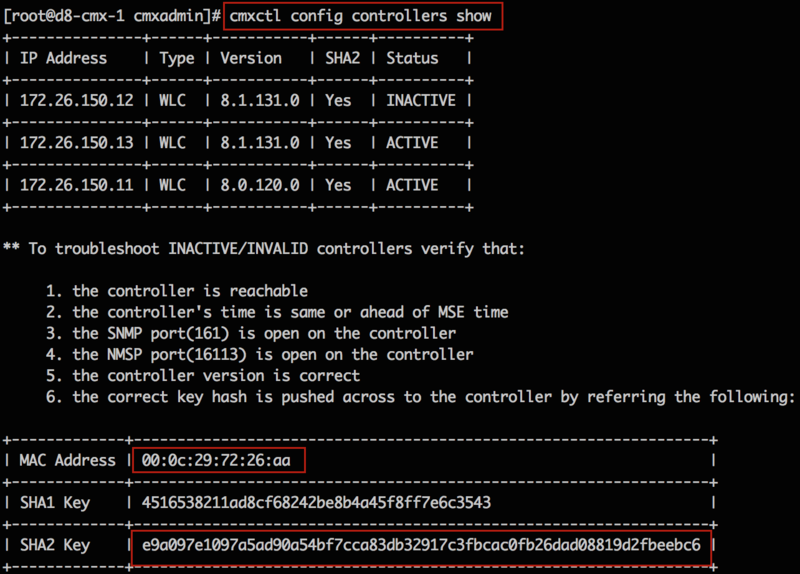
Add the CMX to WLC. For this you need the mac address and SHA2 key from CMX. SSH into the CMX cli and issue the following command
‘cmxctl config controllers show’ and ‘cmxctl config controllers add'
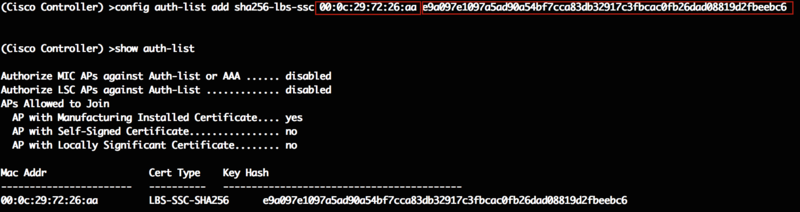
on the WLC add the MSE using the command
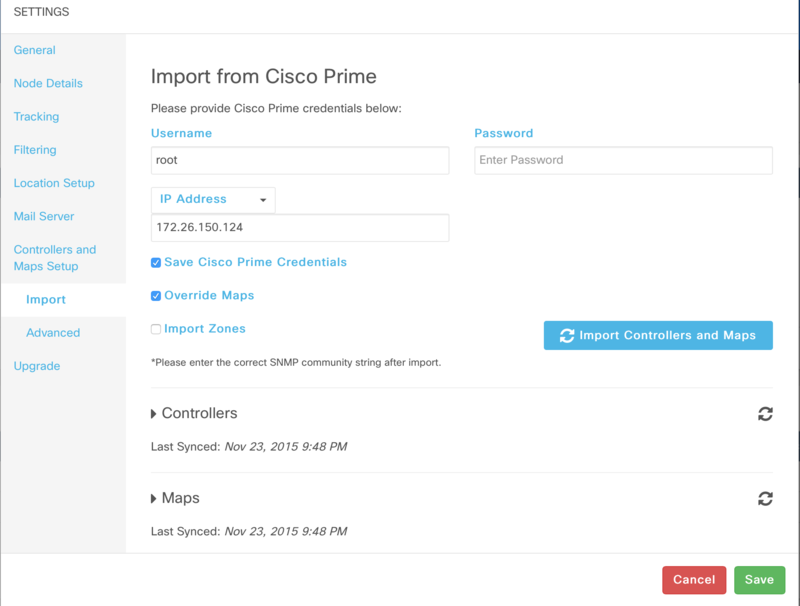
- Adding PI/ WLC and Maps on CMX
Navigate to System tab and click on the gear wheel icon

Click Controllers and Maps setup
Enter credentials to PI webui, check on Override Maps and Save Cisco Prime Credentials checkbox. Import parameters on CMX and click save
There is another method to export and import maps from PI to CMX
On Prime, Go to Maps > Site Maps, click on the required Maps and from the drop down menu on the right top corner, select export maps and hit go.
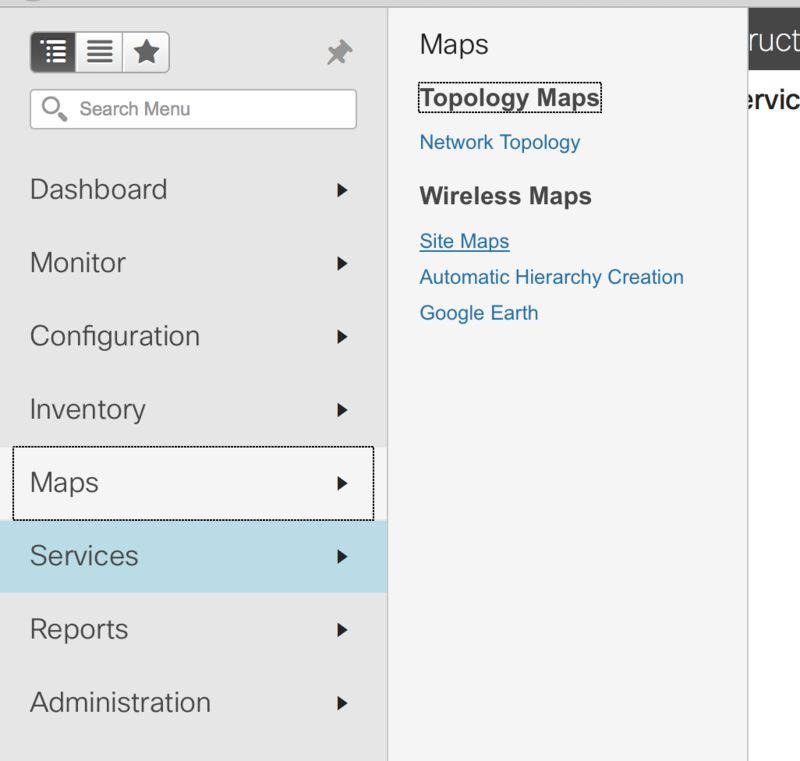

The exported file will be in a .gz format
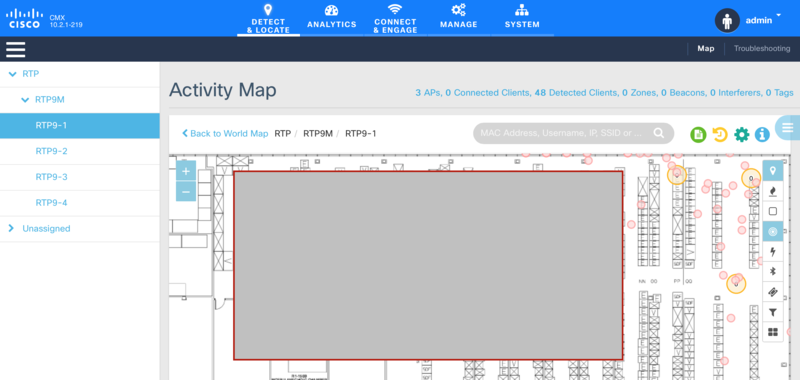
- Verification
Click on Detect and Locate tab and select map
- Adding Prime and WLC on CMX via CLI
Add Prime


Procedure

